Safety
Safety precautions
Operation with external AC/DC power supply unit
Connect the device to the mains power supply using only the power supply unit provided.
If the power supply unit is damaged, contact the technical support service and replace it only with a unit identical to the one supplied with B.4.
Do not overload electrical outlets or extension cords. Before connecting the power supply unit to the mains, make sure that the mains characteristics comply with the technical specifications of the power supply.
Using batteries
- B.4 can be powered by 4 AA alkaline 1.5 V batteries, not included in the package.
- When installing the batteries, observe the polarity (+/−) indicated inside the battery compartment.
- Do not use new and used batteries together, or batteries of different types or characteristics.
- If the device is not going to be used for an extended period, remove the batteries to avoid possible damage caused by leakage.
- If liquid leaks from the batteries, avoid contact with skin and eyes.
- Do not expose the batteries to excessive heat, do not short-circuit them, do not disassemble them and do not throw them into fire.
- Keep batteries out of the reach of children.
Modifications
- Do not open the unit and do not attempt to modify its operation.
Handling
- Do not drop the unit, do not tip it over and do not subject it to shocks or excessive stress.
- Take care not to let liquids or foreign objects enter the device.
- The device may be used by children aged 8 years and above and by persons with reduced physical, sensory or mental capabilities, or lack of experience and knowledge, provided they are given adequate supervision or instruction concerning the safe use of the device and understand the hazards involved.
- Children must not play with the device.
- Cleaning and user maintenance must not be carried out by children without adult supervision.
- Do not use the device near or in environments at risk of explosion.
- Do not use the device in excessively humid places or where it is exposed to rain or water jets.
- Do not immerse the device in liquids.
- Place the device on a stable, flat surface, keeping a minimum distance of 15 cm from the edge to prevent accidental falls.
- Do not use the device inside boxes or containers that prevent proper ventilation.
- Do not remove the support feet on the bottom of the unit.
- Do not use the device on unstable or uneven surfaces.
Environment
- Do not use the unit at extreme temperatures (excessively high or low).
- Do not use the unit near heat sources, such as radiators or heaters.
- Do not use the unit in excessively humid places or in contact with water.
- Do not use the unit in places subject to excessive vibration.
- Do not use the unit in environments with excessive dust or sand.
Handling the external AC/DC power supply unit
- To disconnect the power supply unit from the mains, always grip the body of the power supply and never the cable.
- During thunderstorms, or if the unit is not going to be used for a long period, unplug the power supply from the mains outlet.
- Connect the power supply unit only to mains outlets that are easily accessible to the user.
Connecting cables and input/output jacks
- Always switch off all equipment before connecting or disconnecting cables.
- Before moving the unit, disconnect all connection cables and the power supply unit.
- Connect the device only to equipment that complies with the safety requirements of the applicable technical standards.
- Arrange the connection cables so as to avoid accidental pulling or impacts that could cause the device to fall.
Precautions for use: interference with other electrical equipment
The B.4 equipment complies with the essential requirements of Directive 2014/35/EU.
In particular, the equipment has been designed and manufactured taking into account the state of the art, so that:
- the electromagnetic disturbance generated does not exceed the level above which radio and telecommunications equipment or other devices may be subject to interference;
- it has an adequate level of immunity to the electromagnetic disturbance to be expected under normal conditions of use, ensuring correct operation of the device.
However, particularly sensitive equipment or sources of strong electromagnetic fields placed nearby may cause mutual interference. In such cases, it is advisable to increase the distance between the devices.
As with any digitally controlled electronic equipment, electromagnetic interference may cause malfunctions, data loss or abnormal behaviour. Therefore, pay particular attention to the installation environment.
Cleaning and malfunctions
Cleaning
- Use only a soft, dry cloth to clean the unit.
- If necessary, slightly dampen the cloth.
- Do not use abrasive cleaners, waxes or solvents, including alcohol, benzene or paint thinners.
Malfunctions
If the unit fails or does not work correctly, immediately disconnect the power supply unit from the mains, switch off the device and disconnect all connection cables.
Contact the dealer from whom the product was purchased or an M-Live Service Centre, providing the following information:
- product model;
- serial number;
- detailed description of the malfunction or error encountered;
- name, address and telephone number.
Copyright and disposal
Copyright
- Windows, Windows 10 and Windows 11 are trademarks or registered trademarks of Microsoft Corporation.
- Macintosh and macOS are trademarks or registered trademarks of Apple Inc.
- The SD and SDHC logos are registered trademarks.
- All other product, brand and company names mentioned in this document belong to their respective owners.
Disposal – Information for users
Pursuant to Italian Legislative Decree No. 49 of 14 March 2014, implementing Directive 2012/19/EU on waste electrical and electronic equipment (WEEE).
The crossed-out wheeled bin symbol on the product or its packaging indicates that, at the end of its useful life, the product must be collected separately from other waste.
The separate collection of end-of-life equipment is organised and managed by the manufacturer. Users wishing to dispose of the product must therefore contact the manufacturer and follow the procedures provided to ensure the equipment is correctly delivered to the separate collection systems.
Technical specifications
B.4 technical specifications
| Feature | Specification |
|---|---|
| Internal audio format | PCM (uncompressed) 48 kHz – 24 bit |
| Output S/N ratio | Typical 112 dB |
| Line In input | 1 stereo unbalanced 6.35 mm jack input. Impedance 3.3 kΩ, Range 15 dBu (4.5 Vrms) |
| Compatible audio formats | WAV 44.1 / 48 / 96 kHz (16/24 bit), MP3 CBR (64–320 kbps), MP3 VBR, OGG (64–320 kbps), AAC |
| Headphone output | 6.35 mm stereo jack for 32 Ω headphones |
| Network interface | Ethernet RJ45 10/100/1000 Mbps |
| MIDI OUT port | 3.5 mm Mini Jack – MIDI Type B |
| Internal memory | 16 GB |
| Power supply | USB-C 5.1 VDC – 3 A |
| Alternative power supply | 4 AA batteries (approximate battery life 180 minutes). NOTE: using accessories connected to B.4, such as M-Pen2, MBC or MIDI devices, may reduce battery life |
| USB ports | 2 × USB 2.0 Hi-Speed Type-A (Memory Stick, M-Pen2, MBC). Maximum total current 1.0 A |
| Audio outputs | 4 mono unbalanced 6.35 mm jack outputs: L, R, AUX and CLICK |
| Audio input | 1 stereo 6.35 mm jack audio input |
| Audio output specifications | Range 5 dBu (1.5 Vrms) · Typical THD+N −94 dB · Typical SNR 112 dB |
| Display | 2.4" monochrome OLED – 128 × 64 pixels |
Introducing B.4
A compact multitrack player for the stage
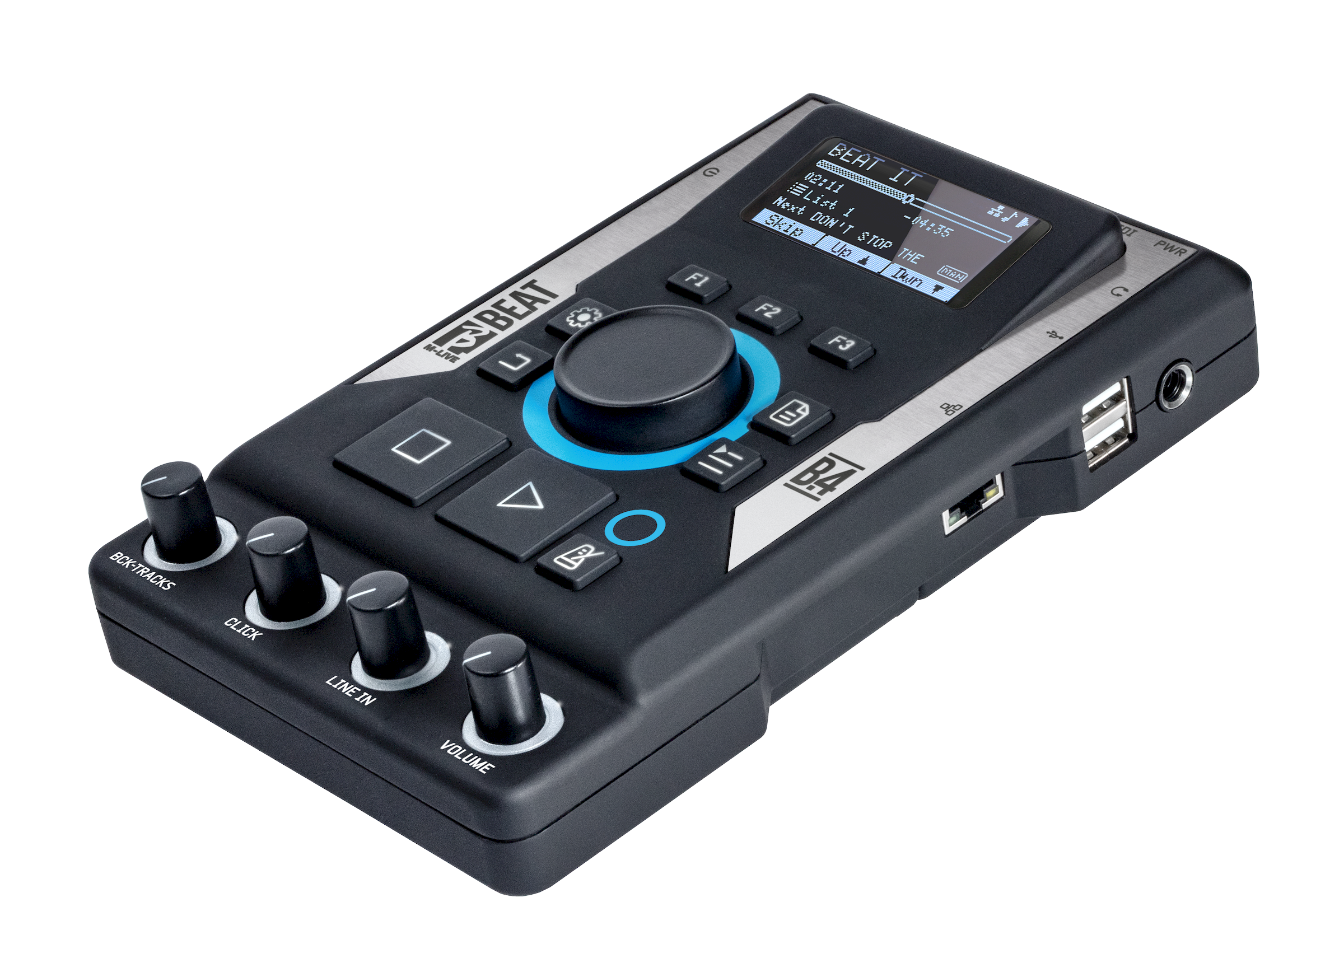
B.4 is a compact multitrack player designed to accompany musicians and bands during rehearsals and live performances.
Born from the experience of the B.Beat family, B.4 concentrates the essential functions for playing and managing Backing Tracks in a simple, intuitive device, allowing you to organise your repertoire and manage the audio content of your performance without having to use a computer on stage.
Compact and easy to carry, B.4 can be used either with an external power supply or with batteries, offering greater freedom of use.
With B.Beat Manager you can prepare and transfer your projects, organise songs and Playlists and manage the content of your performance. During playback, B.4 also lets you manage Backing Tracks and Click separately and send MIDI commands to external devices.
An essential and practical solution, designed for those who use Backing Tracks live and want a dedicated, compact, ready-to-use system. The main features of the device are summarised below.
Playing music files
B.4 supports the main audio formats and can play stereo Backing Tracks and multitrack audio projects prepared with B.Beat Manager. WAV files are supported up to 24 bits per sample; 16-bit files are automatically converted to 24 bits during import. Thanks to its 16 GB internal memory, B.4 can store a large repertoire of Backing Tracks and audio projects.
For best performance, it is recommended to complete all editing, processing and mixing of the tracks in your DAW before transferring the content to B.4 via B.Beat Manager.
Supported audio formats
- WAV 44.1 / 48 / 96 kHz (16/24 bit)
- MP3 CBR 64–320 kbps
- MP3 VBR supported
- OGG 64–320 kbps
- AAC supported
Mixer and headphone monitoring
B.4 lets you manage audio levels simply and intuitively during playback and headphone monitoring. Thanks to the four dedicated potentiometers, you can adjust in real time the level of the Backing Tracks, the Click, the Line In input and the master Volume.
The Click can be sent to the dedicated output and simultaneously to the headphone output, allowing the musician to monitor it during the performance.
B.4 on stage
B.4 has been designed to manage Backing Tracks simply and reliably during live performances. Backing Tracks can be organised into Playlists, and projects can include audio tracks, MIDI data, lyrics and synchronised scores. Lyrics and scores can be displayed during playback via the App Prompter on compatible devices.
Thanks to the MIDI output, B.4 can send MIDI messages synchronised with the Backing Track to control external devices during the performance. B.4 thus brings together Backing Track playback and the management of performance-related content in a single device, reducing the need to use a computer on stage.
Preparing B.4
The Backing Tracks to be used with B.4 can be prepared with a DAW or other dedicated software. Once preparation is complete, the content can be transferred to B.4 via B.Beat Manager, available for Windows and macOS.
B.4 can be connected to the computer via an Ethernet cable or, using the optional M-Pen2 dongle, via a Wireless network. B.Beat Manager lets you transfer and organise Backing Tracks, create and manage Playlists and associate MIDI data, lyrics and synchronised scores with your projects. You can also associate MIDI data with Backing Tracks to automatically send MIDI commands to external devices during playback.
MP3 and WAV files can be played directly from a USB stick or imported into the internal memory of B.4. If a Backing Track has no Click track, B.Beat Manager lets you add one using the dedicated Click generation function.
App Prompter and remote control
B.4 supports the display of synchronised lyrics and scores via the App Prompter, available free of charge for computers, smartphones and tablets. Lyrics and scores are associated with the songs via B.Beat Manager and can automatically follow the playback of the Backing Track.
The App Prompter also lets you remotely control the main functions of B.4, offering convenient access to the controls during live performances. The connection can be made via an Ethernet network or wirelessly using the optional M-Pen2 dongle. M-Pen2 lets you create a hotspot or connect B.4 to an existing Wireless network, allowing computers, smartphones and tablets to communicate with the device.
Song Service
The Song Service catalogue includes a vast musical repertoire that is constantly updated with new Backing Tracks. For copyright reasons, the Song Service may not be available in all countries.
Projects can be customised using your own DAW and then exported in the audio formats supported by B.4 for import via B.Beat Manager.
Song Service is available at the following addresses:
Enjoy your music with B.4!
A look at B.4
What's in the box
The B.4 package includes the following items:
- B.4
- Power supply
- Network cable
- MIDI Type B cable
- Quick start guide
| Item | Image |
|---|---|
| B.4 |  |
| Power supply | 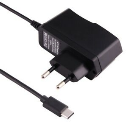 |
| Network cable | 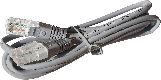 |
| MIDI Type B cable | 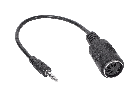 |
| Quick start guide |  |
Full manual: download.m-live.com/manual/b4/
Optional accessories
| Accessory | Description | Image |
|---|---|---|
| M-Pen2 | USB adapter for Wireless connection and hotspot creation. | 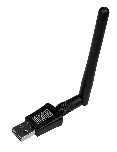 |
| Plier (B.4) | Bracket for mounting B.4 on a microphone stand. | 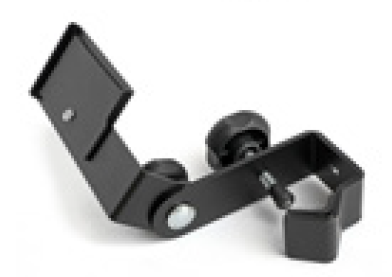 |
The B.4 buttons
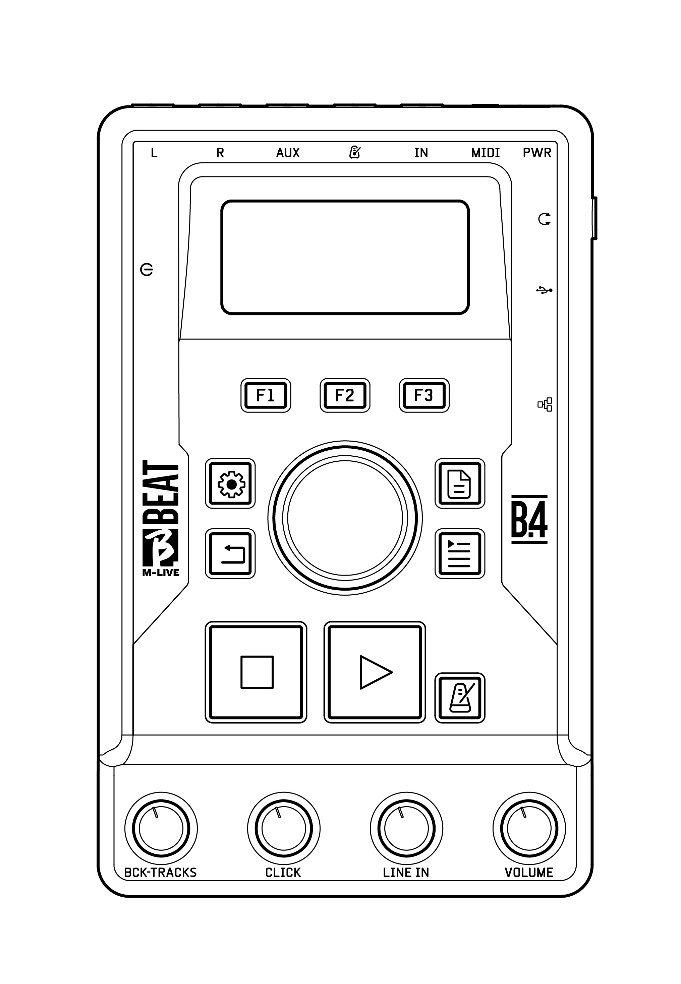
The B.4 buttons provide quick access to the main functions of the device. Some control functions are also available remotely via the App Prompter.
| Button | Function | Icon |
|---|---|---|
| BACK | Returns to the previous screen or level. |  |
| SYSTEM | Accesses the System menu and the device settings. |  |
| FUNCTION BUTTONS F1 · F2 · F3 | Perform different functions depending on the screen displayed. The function assigned to each button is shown at the bottom of the display. |  |
| STOP | Pressed once, it stops playback of the song and pauses it. Pressed a second time, it returns the song to the beginning. Pressed a third time, it frees the device's RAM. |  |
| PLAY | Starts playback of the selected Backing Track. If the player is paused, pressing the button again resumes playback. |  |
| ALPHA DIAL – ENTER | Turn the knob to scroll through menus and lists or change parameter values. Press the knob to confirm the selection (ENTER). | |
| LIBRARY | Accesses the content stored in the internal memory and, when connected, on a USB stick. Audio files on the USB stick can be played directly or imported into the internal memory of B.4. |  |
| PLAYLIST | Accesses the list of Playlists stored on the device for playback and management. |  |
| METRONOME | Accesses the metronome settings and functions. |  |
Potentiometers and power switch
- BACKING TRACKS: adjusts the level of the Backing Tracks in the headphone output.
- CLICK: adjusts the level of the Click track and the metronome in the headphone output.
- LINE IN: adjusts the level of the signal from the LINE IN input in the headphone output.
- VOLUME: adjusts the master level of the B.4 audio outputs.
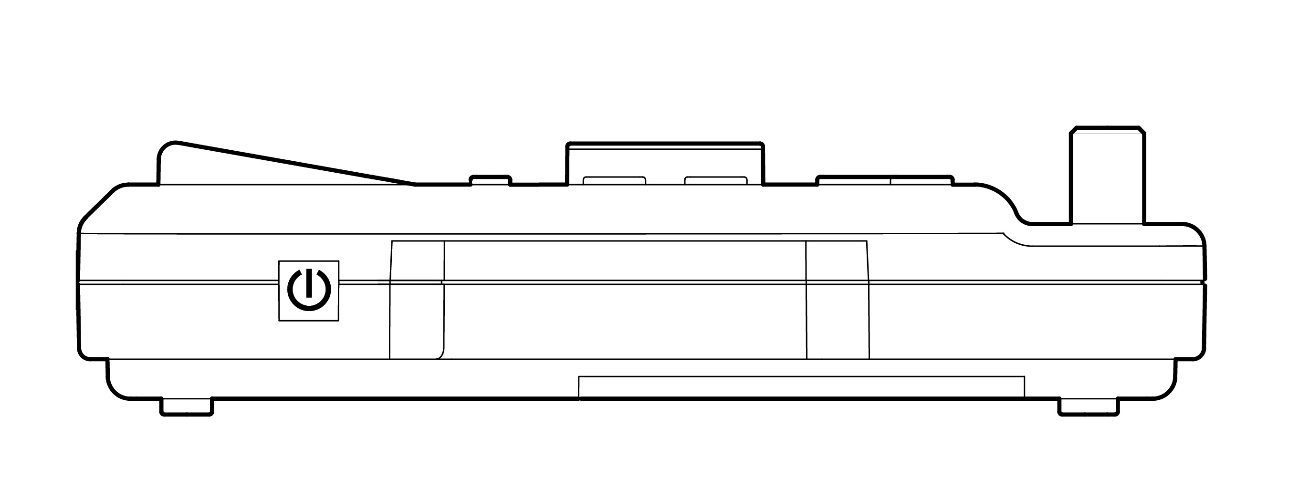
ON/OFF: switches the device on or off.
Connections
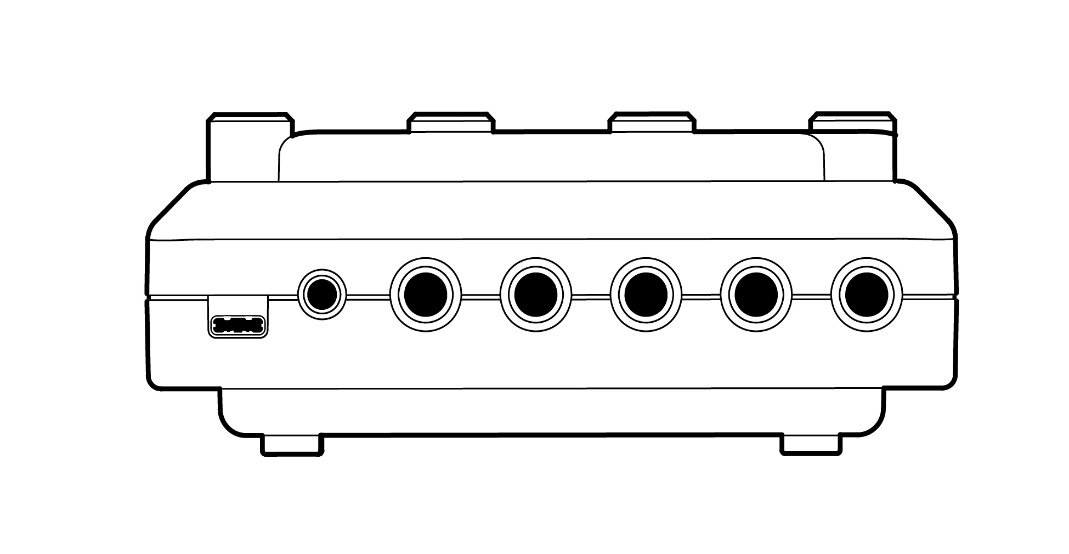
- L, R, AUX, CLICK: four mono unbalanced audio outputs on 6.35 mm jacks for sending the Backing Tracks, the Click track or other audio signals to a mixer or other external devices.
- LINE IN: stereo unbalanced audio input on a 6.35 mm jack for connecting an external audio source.
- MIDI OUT: MIDI output on a 3.5 mm mini-jack, compatible with a MIDI Type B adapter, for sending MIDI messages to external devices.
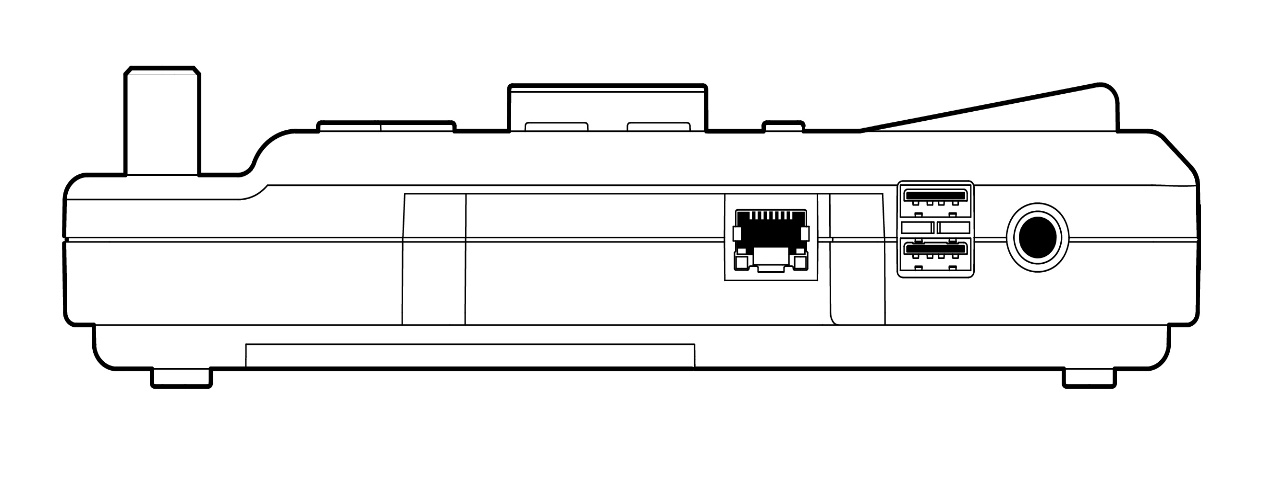
- ETHERNET: connects B.4 to a computer via an Ethernet network for data transfer with B.Beat Manager and for use of the App Prompter.
- PHONES: stereo headphone output on a 6.35 mm jack for monitoring the Backing Tracks, the Click/metronome track and the LINE IN signal.
- USB: the two USB ports allow the connection of:
- USB sticks for importing or playing audio files;
- the M-Pen2 Wireless dongle;
- the M-Live MBC controller for remote control of the main functions of B.4.
By connecting M-Pen2, you can create a Wireless hotspot or connect B.4 to an existing Wireless network, allowing computers, smartphones and tablets to communicate with the device and use the App Prompter.
Battery power
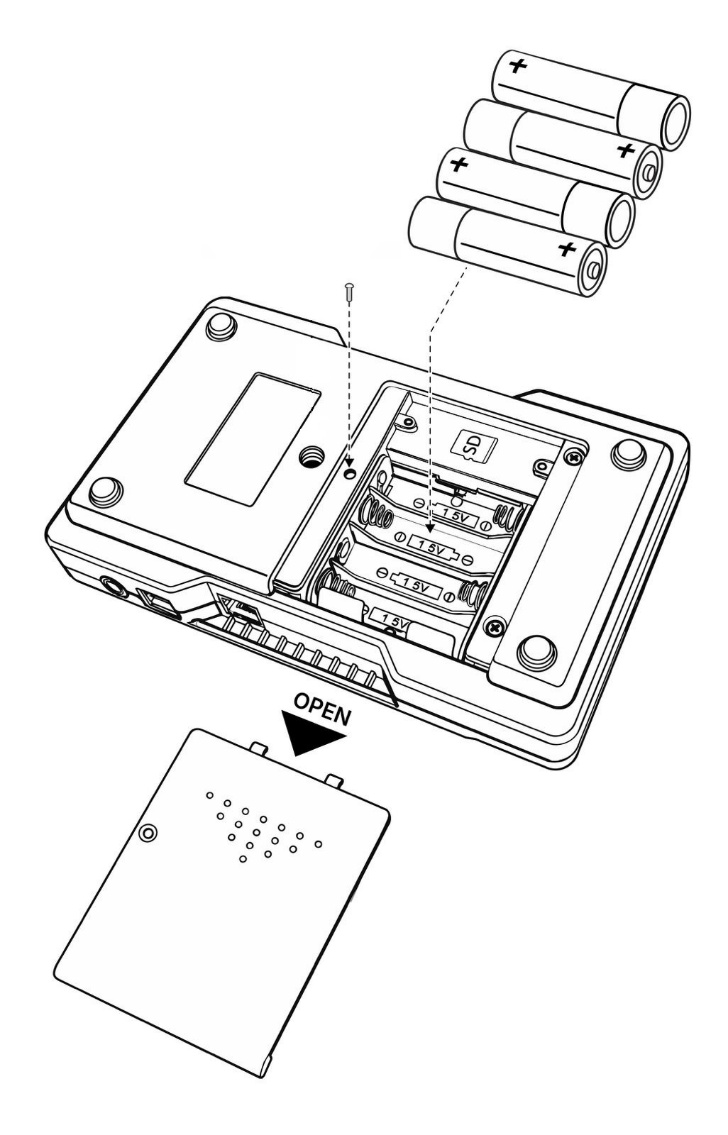
B.4 can be powered by 4 AA alkaline 1.5 V batteries, installed in the dedicated battery compartment, and used without being connected to the external power supply.
The approximate battery life, using only the audio functions, is about 180 minutes.
NOTE: using devices and accessories connected to B.4, such as M-Pen2, the MBC controller or MIDI devices, increases power consumption and may reduce battery life.
Getting started: connections and data transfer
Main functions and connections
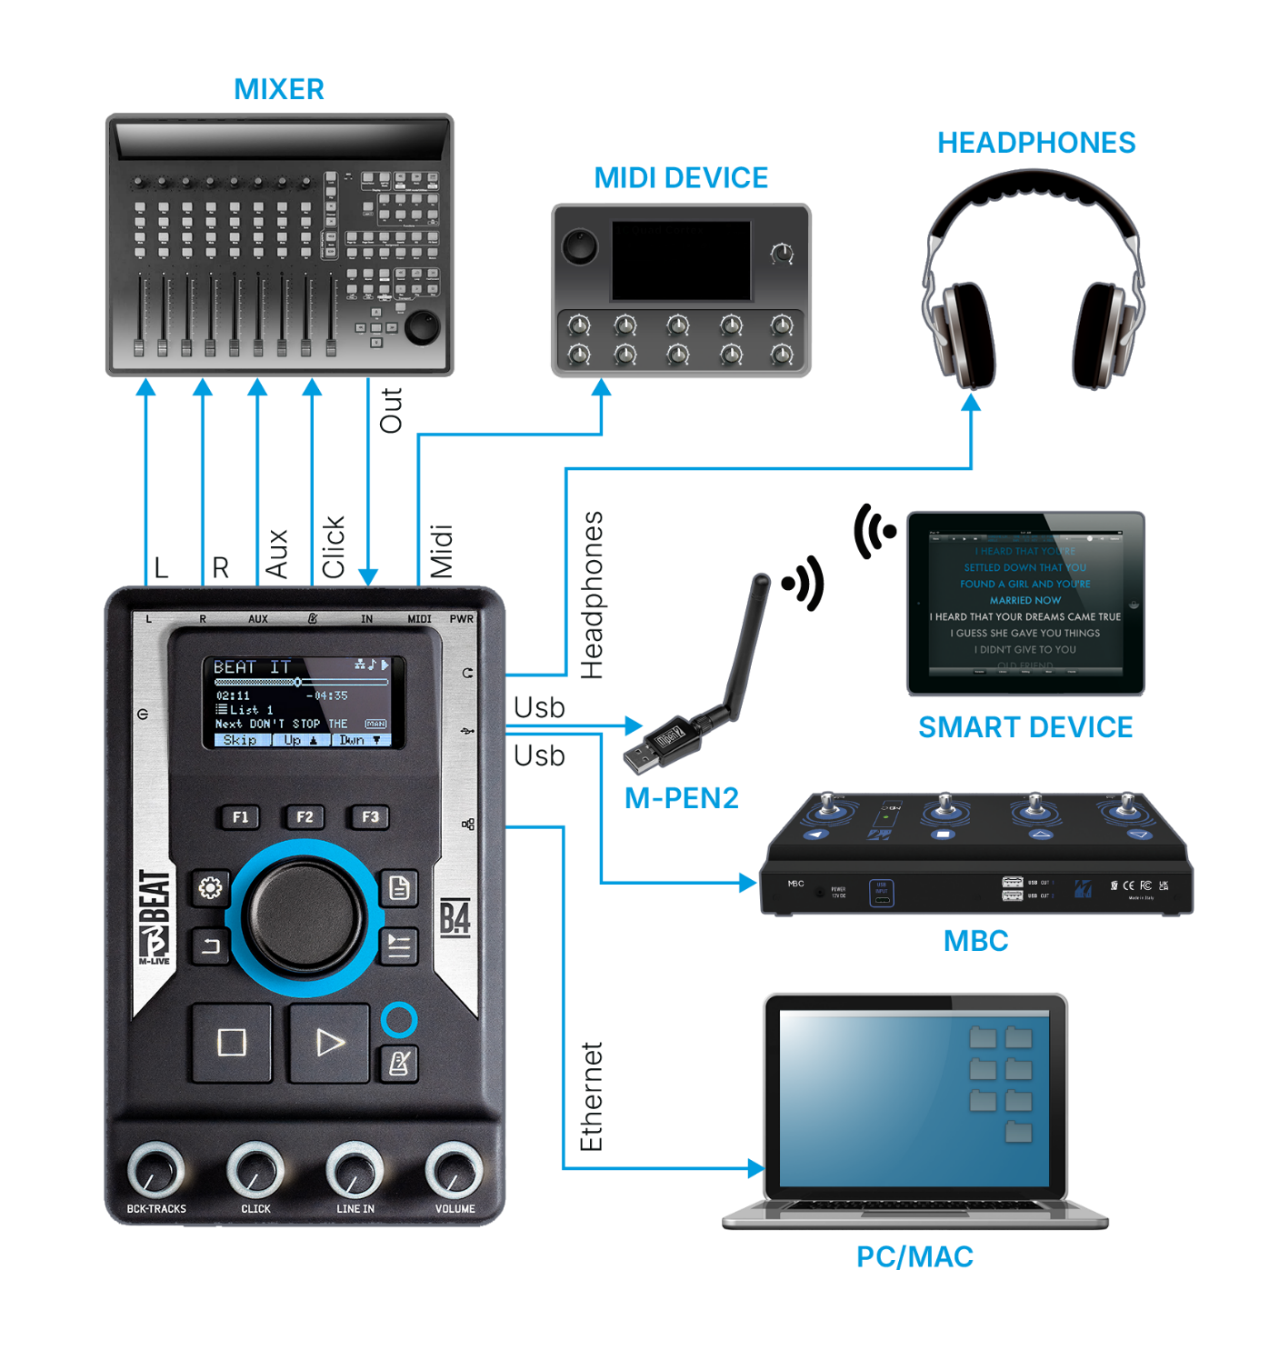
B.4 is designed to integrate easily into a live setup and manage the playback of Backing Tracks and performance-related content. The four audio outputs allow B.4 to be connected to a mixer or an audio system, while the headphone output allows monitoring and the LINE IN input allows an external audio source to be connected.
The MIDI output allows MIDI messages synchronised with playback to be sent to external devices. The Ethernet connection and, via M-Pen2, the Wireless connection allow B.4 to be connected to computers and Smart Devices for content transfer and use of the compatible functions.
The main B.4 connections and an example configuration for a live setup are illustrated below.
Transferring data to B.4
Audio and MIDI projects can be prepared using a DAW or other dedicated software. Once preparation is complete, the content can be transferred to B.4 via B.Beat Manager, available for Windows and macOS.
B.Beat Manager lets you transfer and organise Backing Tracks, Playlists, MIDI files and the other content associated with your projects. MP3 and WAV files can be played directly from a USB stick or imported into the internal memory of B.4.
The following sections explain how to connect B.4 to the computer for use with B.Beat Manager.
Connecting B.4 to the computer
B.4 can be connected to a Windows or macOS computer via an Ethernet network or via a Wireless network using the optional M-Pen2 dongle.
Connecting via Ethernet
- Connect the Ethernet cable between B.4 and the computer.
- Switch on B.4.
- Launch B.Beat Manager.
- After a few seconds, B.4 will be detected automatically by the software. Select it and press Connect.
- The B.4 display will show the connection confirmation screen.
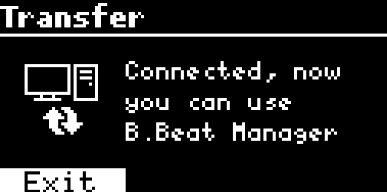
If the computer does not have an Ethernet port, you can use a USB–Ethernet adapter or connect via a Wireless network using M-Pen2.
Connecting via Wireless network (optional M-Pen2)
- Insert the M-Pen2 dongle into a USB port on B.4.
- Temporarily connect B.4 to the computer via an Ethernet cable or via hotspot.
- Launch B.Beat Manager and connect to the device.
- Open the Options menu (gear icon).
- Select the Networks tab.
- Choose the Wireless network to connect B.4 to.
- Enter the network password.
- Click Save and Connect.
- Once configuration is complete, disconnect the Ethernet cable.
- Connect the computer to the same Wireless network as well.
- Open B.Beat Manager again and connect to B.4 via the Wireless network.
The same procedure can also be used with hotspots generated by smartphones or tablets. The network settings are stored on the device and will be reused automatically at subsequent start-ups.
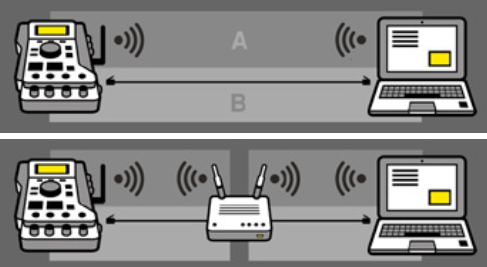
For transferring large amounts of data, such as numerous Backing Tracks or large projects, the Ethernet cable connection is still recommended, as it ensures maximum speed and reliability.
Installing the B.Beat Manager software
B.Beat Manager is available free of charge for the following operating systems:
- Windows 10 and later.
- macOS 10.15 and later.
Full compatibility is not guaranteed on earlier operating systems. The software can be downloaded free of charge from the following addresses:
- Windows: bbeat_manager_win.exe
- macOS: bbeat_manager_mac.dmg
Backing Tracks – Formats
Backing Track formats
Audio Backing Tracks can come in different formats. B.4 can handle:
- MP3, WAV or other compatible audio files in a stereo track, without a separate Click.
- MP3, WAV or other compatible audio files with a separate Click track.
If a Backing Track does not have a Click track, B.Beat Manager lets you add one using the dedicated Click generation function.
Importing a multitrack audio project to B.4
Once the audio project that makes up the Backing Track has been prepared in your DAW, you can export the individual tracks as separate audio files. Save all the tracks belonging to the same project in a dedicated folder, making sure they have the same start point and are correctly synchronised.
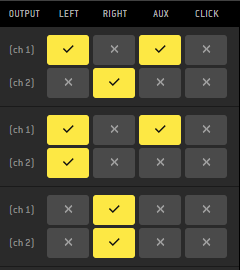
B.4 supports a maximum of 4 mono audio tracks or 2 stereo tracks, also in combination. If the project contains a greater number of tracks, you can still import them into B.Beat Manager. The software lets you mix and group them down to a maximum of 4 audio channels, compatible with B.4.
To import the project to B.4:
- Connect B.4 to the computer via Ethernet or via a Wireless network using M-Pen2.
- Launch B.Beat Manager.
- Create a new audio project.
- Import the folder containing the Backing Track's tracks.
- Configure the project according to your needs.
- Transfer the project to the internal memory of B.4.

For more information on project import and configuration procedures, refer to the B.Beat Manager guide.
Importing MIDI Files to B.4
Projects transferred to B.4 can include, in addition to the audio tracks, a MIDI File synchronised with the Backing Track. The MIDI File allows MIDI messages to be sent automatically to the external devices in your setup. By synchronising these messages with the music, you can, for example, send Program Change, System Exclusive and other MIDI messages to keyboards, expanders or other devices used during the performance.
The MIDI File can also contain lyrics and chords synchronised with the Backing Track. This information can be displayed during playback via the M-Live App Prompter on computers, smartphones and tablets. Lyrics and chords can be entered in your DAW using the appropriate MIDI Meta Events. For more information, see the chapter Writing lyrics and chords.
The MIDI File can be created with your DAW and then associated with the corresponding audio project. During playback of the Backing Track, B.4 sends the MIDI data through the 3.5 mm mini-jack MIDI OUT output, using a compatible MIDI Type B adapter.
To make it easier to import the MIDI File associated with the project, it is recommended to save it in the same folder as the audio tracks of the Backing Track. To import the project, launch B.Beat Manager, create a new audio project and import the folder containing the audio tracks and the associated MIDI File.
For further information on importing and managing projects and Playlists, refer to the B.Beat Manager guide.
Operating environments
Library
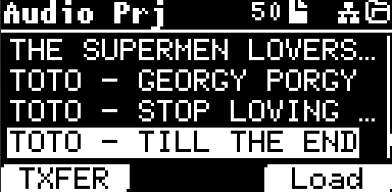
Pressing the LIBRARY button accesses the content stored in the internal memory of B.4 and, when connected, on a USB stick. Turn the ALPHA DIAL to scroll through the list of content and press the knob (ENTER) to select the desired item.
Audio files on a USB stick can be played directly or imported into the internal memory of B.4. When a Backing Track is selected, the commands needed to load it and start playback are available:
- PLAY: starts playback of the selected Backing Track.
- ENTER: opens the selected item or accesses its options.
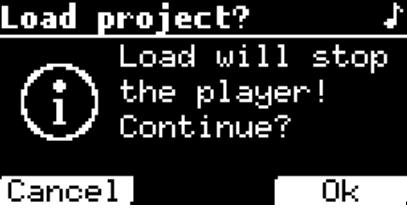
- LOAD: loads the selected Backing Track and prepares it for playback. If another song is already playing, B.4 asks for confirmation before stopping it and loading the new song.
Using a USB stick
B.4 lets you use USB sticks containing Backing Tracks in compatible audio formats, such as MP3 and WAV. By inserting a stick into one of the available USB ports, you can access the files it contains via the LIBRARY button, selecting the USB memory.
Turn the ALPHA DIAL to scroll through the list of files and select the desired one. The following functions are available on the USB FILES screen:
- PRJ (F1): accesses the functions related to the selected project.
- EJECT (F2): safely disconnects the USB stick before removing it.
- LOAD (F3): loads the selected file for playback.
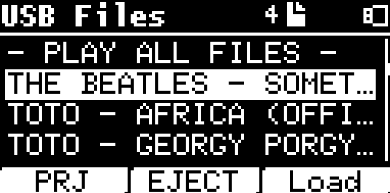
Audio files on the stick can be played directly or imported into the internal memory of B.4 using the dedicated import functions.
NOTE: before removing the USB stick, always use the EJECT (F2) command.
Playing a Backing Track
To play a Backing Track:
- Press LIBRARY.
- Select the internal memory or the USB stick.
- Turn the ALPHA DIAL to find the desired song.
- Press PLAY to start playback or use LOAD (F3) to load the song selected from the USB stick.
During playback, the PLAYER screen is displayed, showing the main information about the Backing Track being played, including the title, the current position and the playback time.
The Song Position Pointer (SPP) indicates the current position within the song. By turning the ALPHA DIAL you can move along the timeline and press ENTER to confirm the new playback position. The time indicators show the elapsed time and the time remaining to the end of the song.
When a Playlist is being played, the display can also show the next song, identified by the NEXT field.
Playback controls
- PLAY: starts playback of the selected Backing Track. If the player is paused, pressing PLAY again resumes playback.
- STOP: pressed once, it pauses playback. Pressed a second time, it returns the song to the beginning. Pressed a third time, it frees the device's RAM.
- ALPHA DIAL: while the Player is displayed, it moves the Song Position Pointer along the timeline. Press ENTER to confirm the selected position.
Edit Tracks
The EDIT TRACKS function lets you change the main parameters of the individual tracks that make up a multitrack Backing Track. The screen shows the track names, their audio level in dB and whether they are assigned to the headphone output.
Use the DWN (F2) button to scroll down and select the different tracks. Turn the ALPHA DIAL to adjust the audio level of the selected track. The following functions are available at the bottom of the display:
- MUTE (F1): mutes or unmutes the selected track.
- DWN (F2): scrolls down through the available tracks.
- PHONES (F3): enables or disables sending the selected track to the headphone output.
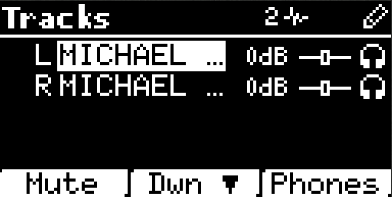
These functions let you adjust the audio balance of the individual tracks and choose which ones to listen to in the headphones during playback.
Playlist
B.4 Playlists
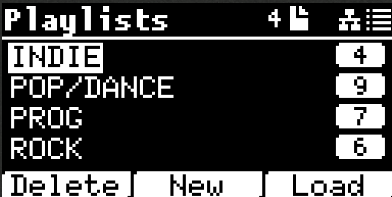
A Playlist is a set of Backing Tracks organised in a user-defined sequence. Playlists let you prepare the set list of songs to be used during a performance in advance, or create collections of Backing Tracks that can be recalled quickly.
Playlists can be created and organised via B.Beat Manager and then transferred to B.4, or created and managed directly on the device.
Pressing the PLAYLIST button displays the list of Playlists stored in the internal memory. Turn the ALPHA DIAL to scroll through and select the desired Playlist. The following functions are available at the bottom of the display:
- DELETE (F1): deletes the selected Playlist.
- NEW (F2): creates a new Playlist.
- LOAD (F3): loads the selected Playlist and displays its content.
Once the Playlist is loaded, you can scroll through the Backing Tracks it contains with the ALPHA DIAL and select the song from which to start playback. Press PLAY to start the selected Backing Track. During playback, B.4 follows the order of the songs set in the Playlist, according to the AUTOPLAY function settings.
Auto Play
The Auto Play function determines how B.4 behaves at the end of playback of a song belonging to a Playlist.
- With Auto Play enabled, at the end of the current Backing Track the next song in the Playlist starts automatically.
- With Auto Play disabled, at the end of the current Backing Track B.4 waits for the PLAY command before starting the next song.
The Auto Play function is configured from the SYSTEM > OPTION menu.
Editing a Playlist
B.4 lets you edit the content of a Playlist directly on the device. Select the desired Playlist, press ENTER to display its content and use the ALPHA DIAL to select a Backing Track. While editing a Playlist you can:
- MOVE: changes the position of a Backing Track within the Playlist.
- REMOVE: removes the selected Backing Track from the Playlist.
- ADD: lets you select a Backing Track from the Library to add to the Playlist.
Creating and deleting a Playlist
Creating a new Playlist
You can create a new Playlist directly on B.4. Go to the PLAYLIST section and press the NEW button to create a new Playlist. Once created, you can select Backing Tracks in the Library and add them to the new Playlist.
Deleting a Playlist
From the list of Playlists you can select a Playlist and delete it from the device memory with DELETE. Confirmation is requested before deletion, to avoid accidental deletions.
Next Song and playing a Playlist
Next Song
While a Playlist is playing, the NEXT field in the Player indicates the Backing Track scheduled as the next song. The next song can also be changed during playback, allowing you to adapt the set list to the needs of the performance.
- SKIP: temporarily excludes the song selected in the Playlist from playback.
- NEXT: sets the selected song as the one following the song currently playing.
- LOAD: loads the selected song into the Player, preparing it for playback.
Playing a Playlist
Select the desired Playlist from the list and load it into the Player. The display shows the list of Backing Tracks contained in the Playlist and indicates the song currently selected or playing.
Turn the ALPHA DIAL to scroll through the songs in the Playlist and press PLAY to start playback of the selected Backing Track. During playback, you can use the functions available in the Player to manage the current song and the next one.
Metronome
The B.4 metronome
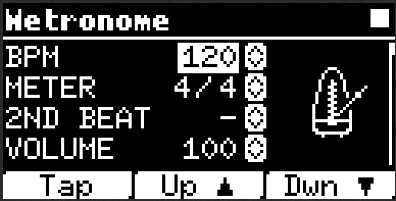
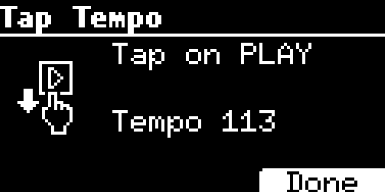
B.4 features a built-in metronome that can be used as a reference during rehearsals and live performances. Pressing the METRONOME button accesses the dedicated screen, from which you can configure the main metronome parameters.
- BPM: sets the metronome speed. Turn the ALPHA DIAL to change the value or use the TAP function, pressing the PLAY button repeatedly to set the tempo manually.
- METER: sets the time signature.
- 2nd BEAT: sets an additional accent within the bar.
- VOLUME: adjusts the metronome level.
The F2 (UP) and F3 (DOWN) buttons change the selected values. Once the parameters have been configured, the metronome can be started with the PLAY button and stopped with the STOP button on B.4.
System
The System menu
Pressing the SYSTEM button accesses the general settings of B.4. The System menu includes the following items:
- OPTION
- NETWORK
- BACKUP TO USB
- B.4 INFO
- QUICK RESTART
- SOFTWARE LICENSE
- FACTORY RESET
Option
The OPTION menu contains the settings relating to the general behaviour of B.4. To access the settings, press the SYSTEM button and select OPTION. The available options are:
| Option | Description |
|---|---|
| AUTO HOTSPOT | Enables or disables automatic start-up of the Wireless Hotspot when the M-Pen2 dongle is used. |
| AUTOPLAY | Enables or disables automatic playback of the next song while a Playlist is playing. With AutoPlay enabled, at the end of a song the next one starts automatically. With AutoPlay disabled, B.4 waits for the PLAY command before continuing. |
| DISPLAY BRIGHTNESS | Adjusts the brightness level of the display. |
| HOTSPOT CHANNEL | Selects the Wireless channel used by the Hotspot generated by B.4 via M-Pen2. |
| KEY BRIGHTNESS | Adjusts the brightness level of the button backlighting. |
| MIDI CLOCK | Enables or disables the MIDI Clock by selecting OFF or ENABLE. |
| MIDI INPUT SETUP | Configures the MIDI commands associated with the PLAY and STOP functions. |
| MIDI STOP | Defines the behaviour of the MIDI output when playback is stopped. You can select OFF or ALL NOTES OFF. |
| MONO HEADPHONE | Selects the headphone output mode between STEREO and MONO. |
| OUTPUT LEVEL | Sets the master output level by choosing between MANUAL POT, FIX +4 dBu and FIX +0 dBu. In MANUAL POT mode the level is adjusted with the VOLUME potentiometer; selecting one of the FIX values uses a fixed output level. |
| TIME FORMAT | Selects the format used to display the time during playback. |
Network
The NETWORK menu lets you view and configure the network connections of B.4. To access the menu, press the SYSTEM button and select NETWORK. The available items are:
- ETHERNET: lets you view and manage the network connection via Ethernet cable. B.4 can be connected directly to a computer or to a wired network to communicate with B.Beat Manager.
- HOTSPOT: this item appears when the optional M-Pen2 dongle is inserted. It enables a Wireless Hotspot generated by B.4, to which compatible computers, smartphones and tablets can connect in order to use B.Beat Manager and the App Prompter.
- WI-FI: this item appears when the optional M-Pen2 dongle is inserted. It lets you connect B.4 to an existing Wireless network, allowing communication with the devices connected to the same network.
NOTE: the HOTSPOT and WI-FI functions require the M-Pen2 dongle and are not available when it is not inserted.
Backup to USB and restore
The BACKUP TO USB function lets you create a backup copy of the data stored in the internal memory of B.4, including Backing Tracks, projects and Playlists. To perform the backup:
- Insert a USB stick into one of the available ports on B.4.
- Press SYSTEM and select BACKUP TO USB.
- Confirm the operation and wait for the backup to complete.
- When finished, remove the USB stick.
Restoring the backup
To restore the data, insert into B.4 the USB stick containing a valid, previously created backup. Follow the instructions shown on the display and confirm the restore.
WARNING: before performing a restore, make sure you have saved any important data stored on the device.
B.4 Info, Quick Restart and Software License
- B.4 INFO: displays the main information about the device, including the installed software version, the serial number, the name assigned to B.4, the memory status and other system and operating information.
- QUICK RESTART: restarts B.4.
- SOFTWARE LICENSE: displays information about the software licences used by B.4.
Factory Reset
The FACTORY RESET function restores B.4 to its original factory condition.
WARNING: this operation deletes all data stored in the internal memory of the device, including Backing Tracks, projects and Playlists. Before proceeding, it is recommended to back up your data using the BACKUP TO USB function.
When FACTORY RESET is selected, B.4 displays a confirmation message before proceeding to delete the data.
Writing lyrics and chords
Synchronised lyrics and chords
B.4 lets you associate synchronised lyrics and chords with your Backing Tracks, which can be displayed during playback via the App Prompter. If you use your own Backing Tracks, lyrics and chords can be prepared in a DAW capable of handling MIDI Meta Events. The MIDI file created in this way must be synchronised with the audio project and then imported via B.Beat Manager.
Writing lyrics
To enter synchronised lyrics, you must use MIDI Meta Events of type 05 – Lyrics. Each Meta Event contains a line of text synchronised with the corresponding point in the song.
- Each line can contain a maximum of 40 characters, including spaces.
- With some DAWs it may be necessary to insert the “|” (pipe) character at the end of the line to indicate a line break.
- Special, accented or international characters are not allowed.
- A maximum of 500 Lyrics Meta Events can be used per song.
As an alternative to writing them manually in a DAW, you can use software capable of creating lyrics in the Standard MIDI Lyrics format.
Importing the lyrics
Once the work is complete, the MIDI file containing the lyrics must be synchronised with the corresponding Backing Track. The MIDI file can be imported together with the audio project via B.Beat Manager or added to the project later as MIDI content. The same MIDI file can contain both the lyrics information and the chords of the song.
Writing chords
Chords are entered using MIDI Meta Events of type 01 – Text. Each Meta Event contains a single chord and must be placed at the exact point in the song where the chord is to be displayed.
Chords must be written using international notation. This encoding allows the App Prompter to interpret and display them also in the dedicated guitar and keyboard modes. A maximum of 1,000 chord Meta Events can be used per song.
For technical support, see this page: www.m-live.com/assistenza